Wednesday, August 15, 2012

Teeny Tiny Tea Time Slippers

After a couple successful forays into the realm of felting... I am starting to feel a tad braver and decided to take on another project, "Tiny Tea Time Slippers" by Amy Munson.


My only choices for colorful, feltable wool in my stash however were bright orange, or neon blue.... so orange it was!

 This pattern was actually quite satisying.  I weighed my skein of yarn, divided it into two equal hanks, and then wound them both into center pull balls.  This pattern uses a mid-row bindoff to make the strap portion, and I used TechKnitter's tips for starting and ending a bind off in the middle of the row to avoid all of the little gappy portions you can end up with otherwise.  Her tips worked wondrously, and I was very happy with the result. 

Also, I used a circular needle for the "straight needle" portions, just because the flexible cable make it easier to get around the corners.  I made a size large, and they fit my daughter (age 4), with a little room to grow.  After one round in the washing machine (hot, low water with several towels), they felted up nicely and were ready for some embroidery and decorative buttons.  Here is E4 enjoying the finished product!  {E4} "OH!!!!  They are SO, SO, SO, SOOOOOO BERRY BEAUT-EE-FULL!!!"


Carrie's Review?  Try this pattern :)  All of the things that I like to see in a pattern were present (stitch counts, easy to understand directions, clear pictures...).  I think that these will make great Christmas gifts for all of the cousins. 

Saturday, August 11, 2012

Birthday Madness

Early August is a crazy time for our family... mainly because 3 out of the 4 kid's birthdays, PLUS our anniversary fall within the span of a week.  This year, the soon to be 11 year old wanted a "Tea Party" themed birthday with her friends, and after a week or so of planning, this is what we came up with!  The menu included:  Chocolate frosted cupcakes, Lemon Scones with Lemon Glaze, World Tea Lemon Cookies, and an assortment of Fruity Herbal Teas (with cream and sugar, of course!)


Wouldn't you know it, though.... the night before the party I went out to the storage area to retrieve the tea cups.... and then I remembered all those episodes of "HOARDERS".... Yep.  That's right... I donated all of those rarely used teacups to Goodwill.  Sooooo.... I had to make an early morning run BACK to Goodwill to purchase teacups (to the tune of $14!!!!).  That's what watching TV will get you, lol!


The party was definitely a hit, though!


I made up several sheets of Fairy Tea Place-Markers to set our tea table, and I thought someone else might be able to use them for their little girl's special day.  Simply print out, add the name, color and fold in half.   (Click the picture to download from dropbox)


Little brother also had a birthday party to attend today, which necessitated a gift for 8 year old cousin.  What to do...... Oh yes!  A drawstring pouch to hold his large collection of die-cast cars (with a couple thrown in for good measure).  I have been getting a lot of use out of this Lined Drawstring Bag tutorial these days!


Friday, August 10, 2012

Hoppity, Hoppity

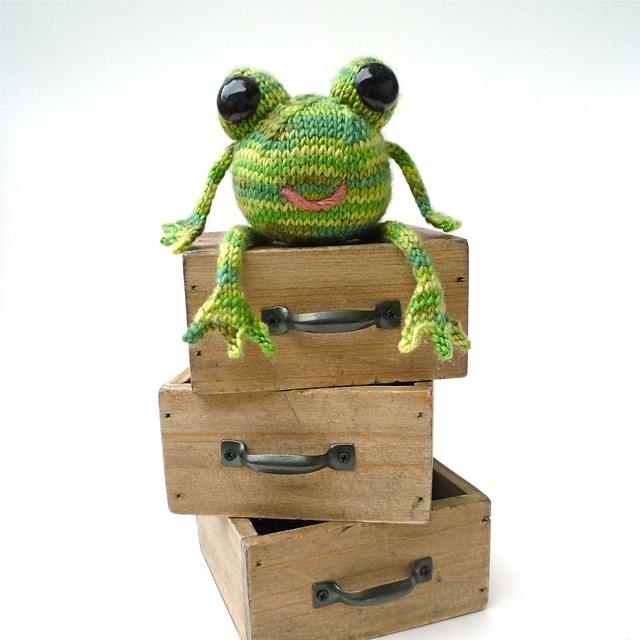
Browsing Ravelry the other day, I came across this darling little pattern:  Happy Frog by Emily Stoneking.  He just cries out to be knit... doesn't he, lol?


However, now that I have knit some softies using Susan B Anderson's techniques (see previous blog post), I REALLY don't like to make patterns where you have to make each of the different pieces to be seamed together at some later time (Because, let's face it... sometimes later never comes!)

So, first I started with the frog body (which is basically just a squashed round shape), and after stuffing it and tidying up my ends, I picked up the required number of stitches the pattern indicates right on the side of the body where I wanted the arm to be placed (using 2 dpns, which I then transitioned to 1 dpn for the I-cord).  This worked out fabulously, and I think added some strength and stability to the finished frog (which is important in a child's toy!)  I repeated this process with the other arm, and both legs.  The eyballs were a little trickier, just because I wanted them to have a slightly wider base.  For each eyeball, I picked up the correct number of stitches in a triangle shape with three dpns, and this helped make sure that the eyeball didn't end up attached to body in a skinny/floppy sort of way.

I used 15 mm safety eyes, plus a judicious amount of stuffing in each eyeball... and TA-DAH!  A finished froggie!

Frog Fronts:


 Frog Back:


Since Mr. Frog is destined to be a gift (if I can keep him away from K2 and S4 - my code names for some of the little ones), I wanted to dress up his presentation with a project bag (froggie themed, of course).  Using my favorite drawstring bag tutorial, I whipped up this little baby:


For more technical information, you can look on my Ravelry project page, here. 
 
After completing Mr. Frog v.1.0, I decided to knit another one out of some variegated Cascase wool I had leftover from another project.  This time I followed the pattern exactly as written, and knitted each piece to seam after completion.  Thus... Mr. Frog v.2.0 was born!


I hope you enjoyed these little hoppers as much as I did :).

Monday, July 30, 2012

Of Summer & Lilacs...

Yes... I know it's the middle of summer (although you really can't tell here in Oregon!) But... a girl can't have TOO many little sweaters for Fall... now can she?  Enter the "Springtime in Hollis" pattern I bought a couple of months ago on Ravelry.

http://www.ravelry.com/patterns/library/springtime-in-hollis


I bought a couple skeins of Berroco Vintage in Aster just for this pattern (love this buttery soft yarn... wears great too!)


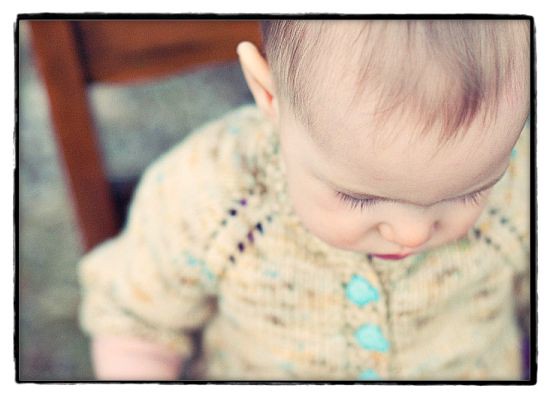
Sooooo... my thoughts on this combo?  I have to say… I LOVE THIS PATTERN. I’m also finishing it up in a size 8… and it is just lovely. Fun to knit, and a very satisfying finish!  I picked up and knit the button bands in one piece, and the lattice work on the bottom of the sweater was easy to memorize and very intuitive. I also adore the Berroco Vintage.. so soft and wears very well!  The I-cord tie really adds to the finished look, I think..... just darling.  Here's my own little darling modeling her newest ensemble (with a forbidden lilac as bribery for the impromptu photo shoot.... I tried using a dandelion, but apparently K has expensive tastes!)


Monday, July 16, 2012

Triangle Bags, Fingerless Gloves & a Wallet... OH MY!

Time for the next round of swapping in the Ravelry $10 Dollar Swap group... and this time the theme is "Project Bags" (which, of course, I am totally in love with, lol!)  My chosen swapee expressed an interest in a triangle shaped project bag, and I found a lovely little tutorial for one here by Robin Quilts.
[logo+square.jpg]
The basic design is the same as any other little zippered bag, except that on a triangle bag you sew one end flat, and the other end perpendicular -- making the triangle shape.  Here is my completed bag (you can see the lining in the second picture)


This little zippered bag is the perfect size for toting around a pair of socks (in progress).  I included some handmade items as well; a pair of fingerless mitts in a lovely heathered purple with a fun trim, and one of my felted wallets.  I made some snagless stitch markers, printed up one of my knitting guides, and a "Knitter's Emergency Candy Kit" (I used skittles this time, since July is a little too hot to be sending chocolate in the mail), added some Harlequin Debbie Norville sock yarn, a package of darning needles, a rectractable measuring tape and a package of buttons to round out my package. 


This package is going into the mail tonight, and I hope it brings a smile to my recipient's face when she receives it this weekend!

Sunday, July 15, 2012

Carrie's Crazy Colorful Socks

I recently finished up a pair of (you guessed it) *orange* socks for S11, and G8 started quickly clamoring for his pair.  But what color?  That was the sticky part of it... he couldn't make up his mind.  Enter, "The Scrappy Sock"!!!  I measured his foot to get an idea of how many stitches to cast on, per my sock making recipe on this post and away we went.  I knit 10 rows of each color, and then G8 would pick out the next scrap for the sequence. 

Here are my sock yarn scraps that I used (notice the neon orange/yellow/pink from my recent dyeing experiment in the back, lol):


and here are the finished socks:


And of course, my happy recipient.  The kids tend to wear their handknit socks until they fall from their feet in pieces, so I really hope the nylon in these extends the shelf-life by a bit!!!

 
As much I liked these socks, I couldn't bring myself to add in the neon orange/purple/pink for the next pair of stripey socks, and so this pair is a tad more muted (but I really like how the color combinations came together!)  This pair is knit out of five different left-over scrap yarn snippets:


This was a very fun, budget-friendly project, and I hope you knit up a pair of your own scrappy, stripey socks :). 

Friday, July 6, 2012

Of Summer & Socks

Summer has been a little late in visiting Oregon this year, and consequently mommy has still been kniting socks.  I received some lovely, multicolored sock yarn in my Ten Dollar Swap Package from mimzy2. 


I set to work on a pair of toddler socks so that I would have some easy car and vacation knitting while the hubby and I were attending the OCEANnetwork homeschooling conference here in Portland, OR. We had such a wonderful time at the conference together, and I picked up several items from the used curriuclum swap that were on my list!

These little socks were just the right complexity level for working on mindlessly while listening to the talks, and on the ride home.  By the way, I have had the WORST time trying to find a toddler sock pattern that fits my little girl's feet, and stays put.  I have finally switched over to this process to make sure those little socks are going to be able to be worn, lol!

For sizing: I measure around the widest part of their little foot; in this case I came up with 6.5 inches.  Socks feel the best when they are a little snug, so I subtract 1 inch for negative ease, which gives me 5.5 inches. Next, I check my gauge with the sock yarn/needles I want to use (normally I have a gauge of 6 st/in on size 2 needles).  After doing a little math (5.5 inches x 6 st/inch = 33 stitches) and rounding up to an even number (36 stitches) for the k2p2 ribbing that I like to use for socks, I can cast on and KNOW that someone will be able to wear these beauties :)

In this case, the someone was GOING to be little K........... but you can see how thrilled she was with the modeling session (sigh...)  Oh well :)