Tuesday, November 24, 2009

Holiday Bazaar

Hello, and happy holidays! Here are some pictures from our most recent bazaar as well as some of our best sellers. Please email ChickenSoupDesigns (haferhouse4 AT wbcable.net) with questions or requests!


Thursday, September 17, 2009

Altered Journal

My niece has an upcoming birthday, and she only had one request ... there MUST be a unicorn. Soooo... I used {Cassidy} by Miss Tiina & Faith True and Mod Podge to cover a composition notebook and a pencil for her "private journal", lol!


First, I scanned in the composition notebook cover so that I could get a rough idea of my design size. Then I printed out a front and back cover (the back cover had an extra piece for covering my pencil) on Kodak Photo Paper (Gloss) and spread a thin layer of Mod Podge over each piece with a foam tool. That only took about 5 minutes to dry, and then I spread a thicker layer of Mod Podge on the front of the composition notebook.


I trimmed the left hand side of my front piece (for a straight edge where it would meet the binding) and then adhered my page. I rolled out any potential air bubbles with my rolling pin (I'm sure a brayer would have worked just as well, but I didn't have one, lol!). I then let it dry for a couple of minutes, flipped it over, and trimmed off the excess with a craft knife. I also sanded the edges and applied another coat of Mod Podge (especially where the front design met the binding). I then repeated the process with the back design (for the back design, you must trim the RIGHT side of the design paper, however!!)

The pencil was very easy as well. Cut a strip of paper that is 1″ by the length of your pencil before it’s sharpened. My pencils were 7″ long. Brush Mod Podge on the strip of paper. Lay pencil on one edge of paper, and then with clean fingers smooth down by rotating the pencil. You can roll on a flat surface to make sure paper is adhered. Brush a little Mod Podge under edge of paper if needed. Let dry 1/2 hour before sharpening pencils.

Here's my finished project:

Thursday, September 10, 2009

Mini Hybrid Gift

While I was waiting in line at Safeway today, I just happened to catch site of the olive bar... and those cute little olive containers. I took one right home and came up with this:


I made the labels for the Hershey Miniatures as described below in my previous post, and I measured the lid, and added a 4" circle with my shapes tool in PSE. I also printed out some additional decorative elements using {Sweetness} by Purple Colourz so that I could add some dimensionality to the lid. Here's a screen shot of what I ended up printing (includes 12 wrappers)


I adhered the printed circle to my lid using my Pioneer Extra Strong Embellishment Glue stick (I love this gluestick... works on anything) and then added a sheer ribbon bow, a couple of matching buttons, and the top cupcake (with foam dots)... I packed the chocolates in the tub with some paper shreds, and presto... a hostess gift for my sister-in-law! Here's the kit I used from FPD:

Hybrid Goodness

I’ll admit it … I have a weakness for chocolate, and I think that it makes the perfect gift! I wanted to dress up some Hershey's miniatures as a gift for my hubby's grandmother.


Here’s what I used to get started:


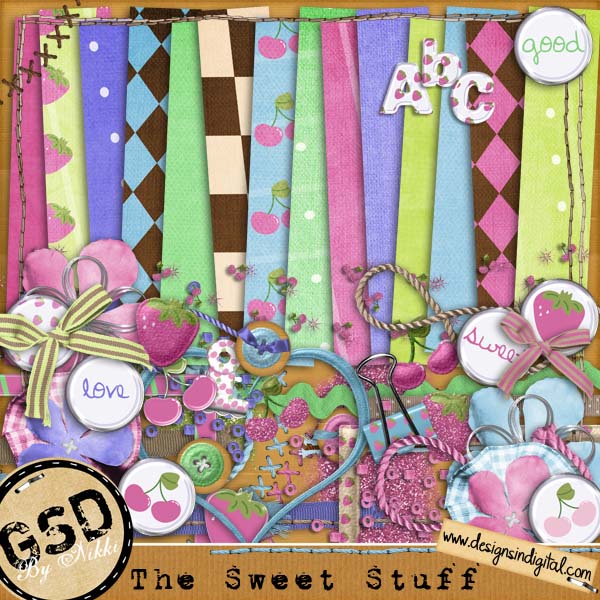
I started by creating labels to wrap around my miniatures. I opened a new 8 1/2 x 11 inch document in Photoshop Elements and created a template for my miniature wrappers. Then I had fun choosing my papers and embellishments from the collab kit {Mod Garden}. After creating each label, I merged it down, and copied it three times (for a total of 12 labels) Here’s a screenshot:

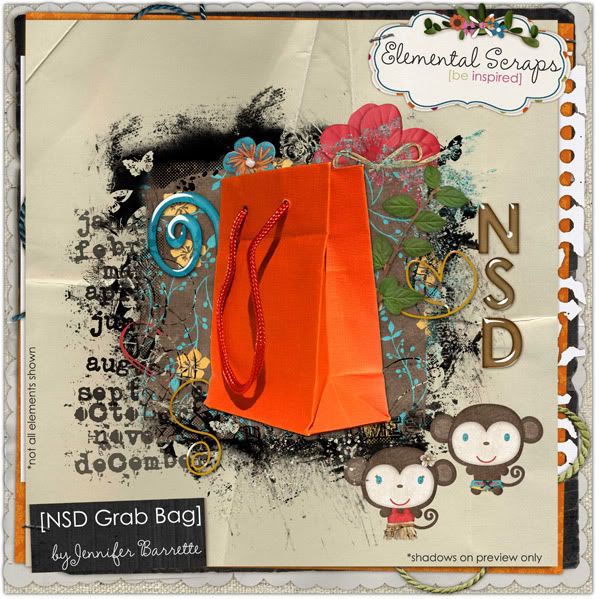
I decided to use my circle element to create a tag to attach to my bag, as well as a crocheted flower from the kit. After printing and cutting out all of my pieces I wrapped each miniature (securing with my Pioneer extra strong glue stick). Then I dressed up my circle design that would be the highlight on the top of my bag. First I adhered it to a slightly larger cardstock circle, and then placed my flower on with a pop-dot. I stuffed the bag with my wrapped nuggets, and some cream shredded paper, and then attached my tag with some coordinating ribbons.

Here's a template (in .psd form) if you want to whip up your own wrappers! Enjoy!


Tuesday, September 8, 2009

Party Favors

My niece has an upcoming birthday, and she only had one request for her invitations and favors... there MUST be a unicorn. Soooo... I used {Cassidy} by Miss Tiina & Faith True, and came up with these:
{Cassidy}


Invitations:

Sucker Wrappers:

Candy Pockets (fits a fun size M&M packet perfectly):


and here is a template that I made for the sucker wrappers, and for the candy pockets so that you can make your own party favors!

Wednesday, August 26, 2009

What I've been working on :)

Well.. school is just about to start, and I've had a lot to get ready. My son is going to be in Kindergarten this year, so now I have two students :) Here's a look at some of my most recent pages:

Photobucket

Wednesday, August 19, 2009

Barnyard Blast

Take a look at this darling kit being released tomorrow by Pamela Donnis and Jan Hosford:


It was perfect for these pictures I had of Sophie at the state fair (only 3 years ago, lol!)

Thursday, August 13, 2009

Quick and Easy Personalized Thank You Cards!

Both my oldest daughter's and my son's birthdays fall right around the end of August, and every year I go all out with the parties, lol! This year my son chose a {Dragons & Dinosaurs} theme for his birthday, and my daughter went with a {Western Theme}. I took pictures of each one of the guests, and made up a 4x6 Thank you card. I had them printed at Costco, and then I mounted them on 4.5 x 6.5 " cardstock. I had each child add a few lines of thanks to the back of each card, and then we sent them out. Very easy, very fast, and very much appreciated by each one of the birthday guests!


Here are my son, Grant's cards:

Here's Sophia's cards:


Using this kit by Traci Murphy:

Saturday, August 8, 2009

Happy Birthday Brag Book

This is a 5x7 Brag Book I am having printed for my nephew, celebrating his 5th
Birthday Party. You can see the whole book here


The templates that I used are from {Templates w/Attitude Brag Book Edition} and {Templates w/Attitude 5x7 set 2}, both by Tracy Blankenship, Papers and elements from I'm This Many from LCC by Amy Stoffel

Wednesday, June 10, 2009

Just in Time for Father's Day

Nikki has a brand new kit out perfect for those father/son, father/daughter moments. My layout features my nephew Chase :)

Monday, June 8, 2009

Need Some Inspiration?

Happy Monday to you! I want to share a fun psuedo-hybrid project I had made using Nikki's gorgeous kit {Color Me Happy}


as well as {Get Your Happy On} by Amy Stoffel, and {Dino-Mite}, also by Amy Stoffel

At www.artscow.com, I stumbled across these two-sided dog tags on sale for $1.99 each with free shipping. The specs call for a 450 x 800 pixel design, so I chose a picture for each child for the front of the dog tag, and then created a name plate for each child using some digital goodies. I then uploaded them to the site as .jpgs and dropped them onto the project. Here's a screenshot of the finished designs:


They just came in the mail last week.. and they turned out awesome! Each side of the dogtag is encased in hard, clear expoxy; so these should be kidproof for a good, long time, lol! As you can see, each of my intended recipients was very happy :)

These tags are still on sale, and turned out to be a great deal... so I might need to make some more!. Hope this inspires your week!

Monday, June 1, 2009

Bounce With Me!

Jennifer Fox and Nikki Epperson have a brand-new kit for you to celebrate Jenn's new store opening at FPD! Check out the bright, fun colors:

I had so much fun with this kit, and I decided that Sophie would love (especially, lol) the bright orange. What a gorgeous girl :)


Thursday, May 7, 2009

{The Sweet Stuff} & a new kit from Amy Stoffel!

Here's a brand new kit from GSD by Nikki (available at Designs in Digital),


and a layout featuring my beautiful girls! They were "napping" on the bed this morning, and I just had to grab a few pictures to remember the moment by!


and a LO celebrating my little Emma that I did with this gorgeous new kit:

Tuesday, May 5, 2009

Hybrid Card

Hi there :) I wanted to make some Thank-You cards to send to guests who attended Emma's first birthday party, and I ran across this great hybrid card template by WithLoveByMushy. She made a cute little Easter card with it.. and I thought it would make an awesome Thank You note! Here's my take on it, using {Bohemian Garden} by Jennifer Barrette. Basically, all you do is print out the 4 x 4 template pieces (I did mine at Costco), and adhere them to a trifolded piece of cardstock (4" by 12"), and then customize with buttons, floss, flowers, etc.


I used this verse to go with my card:

She's a bundle of sweetness,
brightness & fun;
The beauty of springtime,
the warmth of the sun
She's Innocence covered with mud, sand, & soot
She's Motherhood dragging a doll by the foot...
She's a composite picture of giggles & tears
Of tantrums, excitement, amusement & fears
A bundle of mischief and often a tease
A creature of moods not easy to please...
Who'll capture your heart with her pixie-like grin
Or chatter and beg till your patience wears thin
But obedient, naughty, mischievous or coy
She's Mom's little Darling & Dad's Pride & Joy.

Thank you for sharing Emmalyn's first birthday with us. It's so much nicer celebrating with friends!

But, you could adapt any verse to make it entirely your own!

Monday, May 4, 2009

Some Goodies from Jennifer Barrette

Jennifer has a wonderful new grab bag out for NSD, with lots and lots of fun things!


and here's a LO I put together using some of her grab bag goodies!


You won't be disappointed, lol!

Thursday, April 30, 2009

Freebie 4 You!

Hi there! I'm one of the featured CT members on Amy Stoffel's blog today.. and we are giving away a quickpage based on one of my layouts. Come look (and the QP is yours, lol!)

Here's the link: LCC Designs by Amy Stoffel

And here's the QP preview (image is clickable):


Thanks!
Carrie

Thursday, April 16, 2009

Pamela Donnis has an awesome new kit out today called {Dr.'s Orders}, that is perfect for scrapping all of those bumps and bruises, and trips to the Dr.'s office. You can pick it up {Dr's Orders} that is perfect for scrapping all of those boo-boo's, bumps, and trips to the Dr's office. You can pick it up here on sale today! (image is also clickable):


and here's my LO describing my niece's sunbathing routine...


TFL!

Carrie