Monday, July 30, 2012

Of Summer & Lilacs...

Yes... I know it's the middle of summer (although you really can't tell here in Oregon!) But... a girl can't have TOO many little sweaters for Fall... now can she?  Enter the "Springtime in Hollis" pattern I bought a couple of months ago on Ravelry.

http://www.ravelry.com/patterns/library/springtime-in-hollis


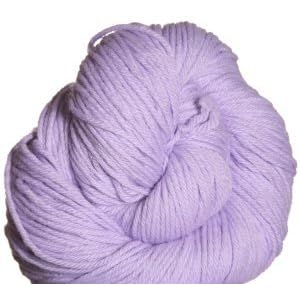
I bought a couple skeins of Berroco Vintage in Aster just for this pattern (love this buttery soft yarn... wears great too!)


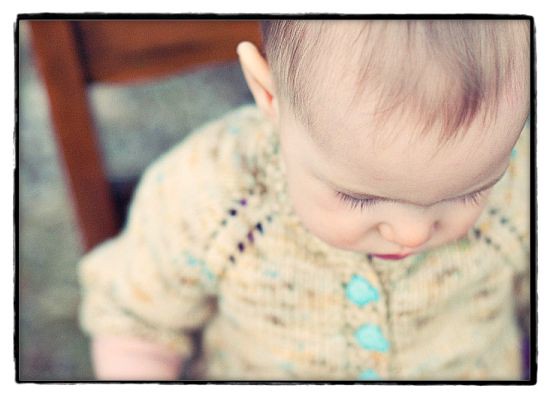
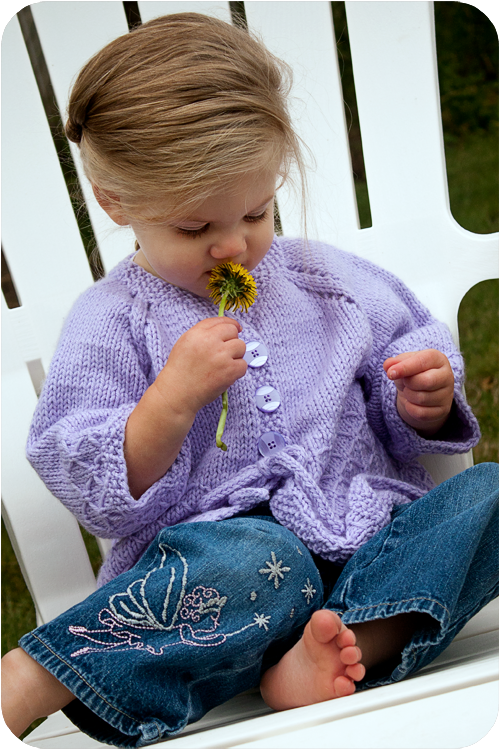
Sooooo... my thoughts on this combo?  I have to say… I LOVE THIS PATTERN. I’m also finishing it up in a size 8… and it is just lovely. Fun to knit, and a very satisfying finish!  I picked up and knit the button bands in one piece, and the lattice work on the bottom of the sweater was easy to memorize and very intuitive. I also adore the Berroco Vintage.. so soft and wears very well!  The I-cord tie really adds to the finished look, I think..... just darling.  Here's my own little darling modeling her newest ensemble (with a forbidden lilac as bribery for the impromptu photo shoot.... I tried using a dandelion, but apparently K has expensive tastes!)


Monday, July 16, 2012

Triangle Bags, Fingerless Gloves & a Wallet... OH MY!

Time for the next round of swapping in the Ravelry $10 Dollar Swap group... and this time the theme is "Project Bags" (which, of course, I am totally in love with, lol!)  My chosen swapee expressed an interest in a triangle shaped project bag, and I found a lovely little tutorial for one here by Robin Quilts.
[logo+square.jpg]
The basic design is the same as any other little zippered bag, except that on a triangle bag you sew one end flat, and the other end perpendicular -- making the triangle shape.  Here is my completed bag (you can see the lining in the second picture)


This little zippered bag is the perfect size for toting around a pair of socks (in progress).  I included some handmade items as well; a pair of fingerless mitts in a lovely heathered purple with a fun trim, and one of my felted wallets.  I made some snagless stitch markers, printed up one of my knitting guides, and a "Knitter's Emergency Candy Kit" (I used skittles this time, since July is a little too hot to be sending chocolate in the mail), added some Harlequin Debbie Norville sock yarn, a package of darning needles, a rectractable measuring tape and a package of buttons to round out my package. 


This package is going into the mail tonight, and I hope it brings a smile to my recipient's face when she receives it this weekend!

Sunday, July 15, 2012

Carrie's Crazy Colorful Socks

I recently finished up a pair of (you guessed it) *orange* socks for S11, and G8 started quickly clamoring for his pair.  But what color?  That was the sticky part of it... he couldn't make up his mind.  Enter, "The Scrappy Sock"!!!  I measured his foot to get an idea of how many stitches to cast on, per my sock making recipe on this post and away we went.  I knit 10 rows of each color, and then G8 would pick out the next scrap for the sequence. 

Here are my sock yarn scraps that I used (notice the neon orange/yellow/pink from my recent dyeing experiment in the back, lol):


and here are the finished socks:


And of course, my happy recipient.  The kids tend to wear their handknit socks until they fall from their feet in pieces, so I really hope the nylon in these extends the shelf-life by a bit!!!

 
As much I liked these socks, I couldn't bring myself to add in the neon orange/purple/pink for the next pair of stripey socks, and so this pair is a tad more muted (but I really like how the color combinations came together!)  This pair is knit out of five different left-over scrap yarn snippets:


This was a very fun, budget-friendly project, and I hope you knit up a pair of your own scrappy, stripey socks :). 

Friday, July 6, 2012

Of Summer & Socks

Summer has been a little late in visiting Oregon this year, and consequently mommy has still been kniting socks.  I received some lovely, multicolored sock yarn in my Ten Dollar Swap Package from mimzy2


I set to work on a pair of toddler socks so that I would have some easy car and vacation knitting while the hubby and I were attending the OCEANnetwork homeschooling conference here in Portland, OR. We had such a wonderful time at the conference together, and I picked up several items from the used curriuclum swap that were on my list!

These little socks were just the right complexity level for working on mindlessly while listening to the talks, and on the ride home.  By the way, I have had the WORST time trying to find a toddler sock pattern that fits my little girl's feet, and stays put.  I have finally switched over to this process to make sure those little socks are going to be able to be worn, lol!

For sizing: I measure around the widest part of their little foot; in this case I came up with 6.5 inches.  Socks feel the best when they are a little snug, so I subtract 1 inch for negative ease, which gives me 5.5 inches. Next, I check my gauge with the sock yarn/needles I want to use (normally I have a gauge of 6 st/in on size 2 needles).  After doing a little math (5.5 inches x 6 st/inch = 33 stitches) and rounding up to an even number (36 stitches) for the k2p2 ribbing that I like to use for socks, I can cast on and KNOW that someone will be able to wear these beauties :)

In this case, the someone was GOING to be little K........... but you can see how thrilled she was with the modeling session (sigh...)  Oh well :)