Showing posts with label Baby. Show all posts

Monday, November 25, 2013

A Little Pumpkin

Knitting seems to have ground to a halt, here in "We Just Had a New Baby" land..... and while I understand that this is a good thing, I sure miss my de-compressing, de-stressing, relaxing vigil of late night crafting.  However, all is not lost!  My hubby graciously agreed to hold the little one for a couple of hours so that I could knit this darling (and oh so seasonal) little hat!

The only problem?  I specifically, and apparently very deliberately, ordered the wrong weight yarn from KnitPicks.  I got the right weight for the stem (in Knit Picks Wool of the Andes, Superwash, Bamboo Heather in worsted) and the wrong weight for the pumpkin body (Knit Picks Wool of the Andes, Pumpkin in sport weight).  Too bad almost the entire hat is knit in the orange!!!


After some fiddling and swatch testing (and guessing), I hit upon the perfect solution.  I cast on 80 stitches (the amount suggested for the medium sized hat) on size 6 needles.  I can't tell you how many times during the course of its construction that I looked at it and thought..... "There is NO WAY that is going to fit her... It's going to be SOOOO BIG!"  But.... now it's finished....


And it fits perfectly!  Just in time for Halloween and the Thanksgiving holiday (might as well get two holidays out of it, after all!)  Here's my project page on Ravelry.


There's just something about a baby in a hat that resembles a piece of fruit... you know :)

Sunday, August 26, 2012

Simply Baby

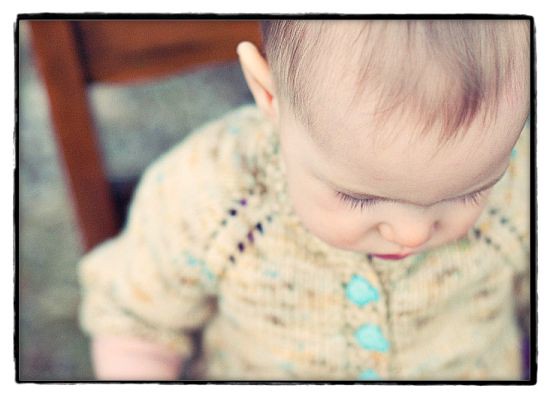
I recently came into posession of a partially finished baby sweater by an older woman who was losing her eyesight. One of my relatives wanted it finished, so she could gift it to her first grandchild (due next month).

The pattern was in the bag with the extra yarn and the partially completed sweater… It was hand-typed on a scrap of yellowed paper, and I have not been able to find it on the internet anywhere (there are no credits on the pattern, either).

Normally, I prefer my baby patterns to be of the "Top Down, Seamless" variety... but I wanted to help her out, and the little sweater did not look THAT complicated, lol!  I am also not a fan of 100% acrylic yarn, and this little sweater is knit out of 3 Ply Jamie baby yarn, in a light green color:


I was also a little unsure on the seaming.. and even though I searched throughout Ravelry, and all over the internet, I could not find this pattern anywhere.  It really is a simple little pattern, however... knit all in one piece with seams to finish up the sides and underarms.  I also had to take out several rows where the poor older woman had started to have trouble with the stitches... but after a couple hours of work (and some gentle steam blocking) - it is all finished!


And just in case you are need of a simple little baby sweater pattern.. I retyped the original for you :)


Simple Infant Sweater:  (#8 or #9 needles – knit worsted yarn)
(Numbers in parenthesis are for lighter weight sport yarn)

Starting at lower back edge, cast on 40 (50) sts.  Work garter st. (Knit each row) for 6 rows.  Work in stockinette st. (knit 1 row, purl 1 row) to 7” from start, end with purl row.  Cast on 18 (24) sts. at end of last row for sleeve.  Turn, knit across, cast on 18 (24) sts for other sleeve.  Work on these sts.  as follows:  Row 1 – K5 for garter st. cuff, purl to last 5 sts., k5 for cuff.  Row 2- K across.  Repeat these 2 rows for 3” above sleeve cast on sts.  End on right side.

Work 31 (39) sts and slip to holder.  Bind off center 14 (20) sts. for neck, work to end.  Work on the 31 (39) sts. for 4 rows.  Inc. 1 st. at end of next row for neck edge, then inc. 1 sts at same edge every other row twice more.  Work on the 34 (42) sts for 2 rows.  Cast on 7 (9) sts at end of last row for front.  Next row, K5 for front garter st. border, purl to last 5 sts, K5.  Keep 5 sts at front border in a garter st.  Work until sleeve measure 7”.  End at cuff edge, bind off 18 (24).  Work to end.  Work on 25 (27) until front is the same length as back.  K6 rows for border.  Bind off.

Slip sts of other side to needle with point of needle at neck.  Join yarn and work across the 31 (39) sts.  Work 3 more rows.  Inc. 1 st. at beg. Of next row, then inc. 1 st. at same edge every other row twice more, end at cuff edge.  Work one more row on the 34 (42) sts, cast on 7 (9) for front.  Finish same as the other side.

Neckband – ON right side, starting at right front edge, pick up and K11 (13) sts, along neck.  Pick up and knit 14 (20) on back, and 10 (13) on other side.  Knit garter st. for 6 rows.  Bind off.  Sew up underarms.

Friday, August 10, 2012

Hoppity, Hoppity

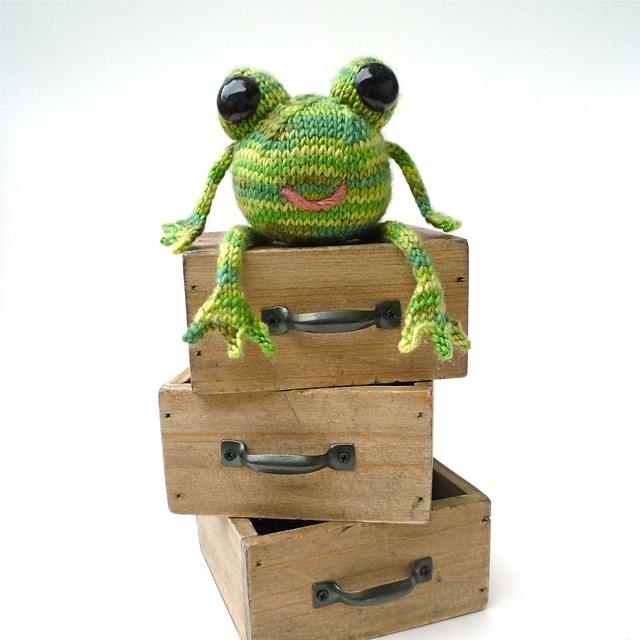
Browsing Ravelry the other day, I came across this darling little pattern:  Happy Frog by Emily Stoneking.  He just cries out to be knit... doesn't he, lol?


However, now that I have knit some softies using Susan B Anderson's techniques (see previous blog post), I REALLY don't like to make patterns where you have to make each of the different pieces to be seamed together at some later time (Because, let's face it... sometimes later never comes!)

So, first I started with the frog body (which is basically just a squashed round shape), and after stuffing it and tidying up my ends, I picked up the required number of stitches the pattern indicates right on the side of the body where I wanted the arm to be placed (using 2 dpns, which I then transitioned to 1 dpn for the I-cord).  This worked out fabulously, and I think added some strength and stability to the finished frog (which is important in a child's toy!)  I repeated this process with the other arm, and both legs.  The eyballs were a little trickier, just because I wanted them to have a slightly wider base.  For each eyeball, I picked up the correct number of stitches in a triangle shape with three dpns, and this helped make sure that the eyeball didn't end up attached to body in a skinny/floppy sort of way.

I used 15 mm safety eyes, plus a judicious amount of stuffing in each eyeball... and TA-DAH!  A finished froggie!

Frog Fronts:


 Frog Back:


Since Mr. Frog is destined to be a gift (if I can keep him away from K2 and S4 - my code names for some of the little ones), I wanted to dress up his presentation with a project bag (froggie themed, of course).  Using my favorite drawstring bag tutorial, I whipped up this little baby:


For more technical information, you can look on my Ravelry project page, here
 
After completing Mr. Frog v.1.0, I decided to knit another one out of some variegated Cascase wool I had leftover from another project.  This time I followed the pattern exactly as written, and knitted each piece to seam after completion.  Thus... Mr. Frog v.2.0 was born!


I hope you enjoyed these little hoppers as much as I did :).

Monday, July 30, 2012

Of Summer & Lilacs...

Yes... I know it's the middle of summer (although you really can't tell here in Oregon!) But... a girl can't have TOO many little sweaters for Fall... now can she?  Enter the "Springtime in Hollis" pattern I bought a couple of months ago on Ravelry.

http://www.ravelry.com/patterns/library/springtime-in-hollis


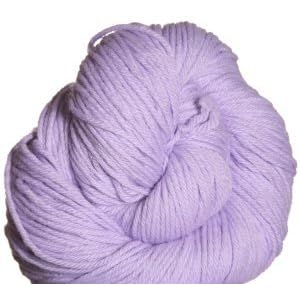
I bought a couple skeins of Berroco Vintage in Aster just for this pattern (love this buttery soft yarn... wears great too!)


Sooooo... my thoughts on this combo?  I have to say… I LOVE THIS PATTERN. I’m also finishing it up in a size 8… and it is just lovely. Fun to knit, and a very satisfying finish!  I picked up and knit the button bands in one piece, and the lattice work on the bottom of the sweater was easy to memorize and very intuitive. I also adore the Berroco Vintage.. so soft and wears very well!  The I-cord tie really adds to the finished look, I think..... just darling.  Here's my own little darling modeling her newest ensemble (with a forbidden lilac as bribery for the impromptu photo shoot.... I tried using a dandelion, but apparently K has expensive tastes!)


Sunday, May 27, 2012

Triple the Fun!

I found out on Monday that I needed a shower gift for a upcoming baby shower on Memorial day.. and then they told me it was a TRIPLE baby shower.  Eeek!  I was starting to panic until I remembered the Wee Ones Craftsy Class I blogged about here.  Aha!  Problem solved!  I pulled out some of my favorite baby yarn (Martha Steward Extra Soft Wool Blend) and got to work. 

I decided to make one each of the bunny, elephant and hippo:


and while they were certainly cute... they just seemed to need a little something extra to make the gift complete, lol!  So I took a look at the nearest fabric store and came home with these three fabrics:


To turn into these, following the lined drawstring bag tutorial I blogged about here.  I also printed off some of my free "Knitting Gift Tags" to attach to each package.


I was also browsing my local Goodwill for some sweaters to unravel, and came up with the idea of including a board book that fit with each individual animal to include in the gift... so here are my completed gift packages!


I hope that this inspires you as well.. in case you have any gift giving in your future!  Here's hoping all of the intended recipients fall in love with them as well :)


Tuesday, April 17, 2012

Lacy Little Cardigan


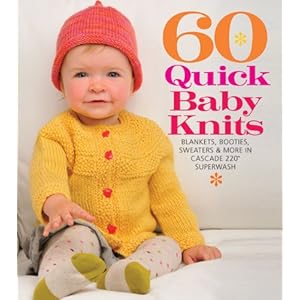
60 Quick Baby Knits: Blankets, Booties, Sweaters & More in Cascade 220 Superwash (Sixth & Spring)I bought a copy of 60 Quick Baby Knits, and I wanted to knit the “Lace Motif Cardigan”. However, I’ve only been knitting for a year, and I have yet to venture out of the realm of the top-down Raglan sweater, with no seaming (and the Lace Motif Cargigan DEFINITELY calls for seaming!).
Soooooo….. I decided to alter the pattern. I used the basic measurements of the 18-24 month size of the “Cardigan Rose” pattern, and added in the Lace Motif. Here are my alterations:
  • Cast on 72 stitches, placed markers as directed and knitted in garter stitch until I had 4 rows of purl bumps.
  • I knit a 5 st garter band, and then a 2 stitch “spacer” before starting the lace chart (row 11 for the left side, row 1 for the right side - so that the pattern would be mirrored down the front) and worked a simple buttonhole (k2, yo, k2tog, k1) in the 5 stitch garter band (instead of a 7 stitch as called for in the pattern) on the left hand side.
  • Continued in stockinette and lace pattern (increasing at markers with a simple m1, sm, m1) until there were 6 garter ridges after the buttonhole. Then I placed another buttonhole (k2, yo, k2tog, k1)…. I ended up doing this twice so that I had three buttonholes (spaced 6 garter ridges apart) on the front of the sweater.
  • Followed the cardigan pattern for putting aside sleeve stitches, etc (omitting the garter ridges worked into the body of the Cardigan Rose pattern) and after achieving the desired length of 10.25”, I ended with 4 garter stitch ridges (and bound off knitwise on a purl row to make the bind off blend in).
  • I went back and picked up the sleeves (picked up 2 additonal stitches under the arm, and decreased them on the next round), k6 rows in stockinette, and then alternated knit and purl rows until I had a series of 4 garter ridges, and bound off purlwise.
  • I added a simple crochet border to the bottom/sleeves of the sweater as follows: 1 sc in first st, * ch 3, 1 dc in first ch, skip 2 sts , 1 sc in next st , repeat from-* across.
The only tricky part was remembering that the lace pattern was not the same for both sides of the cardigan (so that it would be mirrored). Also, with the Raglan shaping, there are not 12 stitches available for the lace panel at the start of the sweater…(you keep adding available stitches everytime you increase at the marker). This worked out fine because the lace chart does not “do” anything in these missing stitches until further down the cardigan, and at this point you have increased enough that there are 12 stitches available for the lace panel (just barely, though, lol!)

I also knit her a matching headband using this pattern from KnitPicks (the Amy Lynn Headband).

Here is the finished product, after blocking, modeled by the lovely K :)


Monday, April 9, 2012

Itty Bitty Cabled Set

Yet another itty-bitty baby set... this time with cables! I finished the Little Owl Set with enough time to make a gift for another upcoming baby shower. I still have several skeins of the Martha Stewart Crafts Extra Soft Wool Blend in the 506 Igloo, and after making a gazillion baby sweaters lately, I wanted something with some interesting bits. So, I decided to make this little sweater that has been languishing in my Ravelry queue for ages.... the Bitty Cabled Cardigan by Heather Cabanas


My gauge with size 7 needles was 4.5 st/ 6 row per inch (as called for in the pattern). I also used the ”cabling without a cable needle” technique that I like from grumperina - really speeds up those cables, when you aren't constantly sliding them to a cabling needle.

After steam blocking, my finished measurements were as follow: Body - 9” across, Arms are 4” from underarm, Height (from collar) 8”.

I also altered the pattern slightly so that I ended up with 5 buttonholes instead of the 4 in the pattern.

What a darling little cardigan! So, with gauge, this little sweater really is just that… little! This seems like a good newborn size (my youngest is a year… but this sweater is a good fit for all of the little onesies I have saved in her closet, lol!).

To round out the set, I added the Bitty Cabled Hat also by Heather Cabanas. After reviewing the notes on this pattern, it seemed to run a tad small, so I added another 6 stitches to the cast-on (to account for another cable). This was the only alteration I made, though, in terms of size.  Finished hat fit a 4 month old snugly, so I am happy with the size.

Finally, I decided to go with the Bitty Booties by Natalie Larson. These little booties have a knitted casing with some hidden elastic to make them as kick-proof as possible (as a mother of four - I assure you that this is a good thing!). Here's the link to my set on Ravelry


Thursday, April 5, 2012

Owl Love You Forever

I needed a quick little baby gift set, so that I could wing it on it's way up North... enter the "Hoot Cardigan" by Brenna Kotar.


I had almost a whole skein of the Berroco Vintage Breezeway left over from the Breezeway wrap, and since it is soft and machine washable (and Blue!), I thought it would be perfect.  However, after only a couple rows into the pattern, I started noticing some problems.  I thought I would write down all my notes in case I want to make another someday.

This pattern really is hard to understand as written, in my opinion… which is really a shame, because it is so cute.
  • This pattern calls for you to cast on with an I-Cord cast on… very simple, and has a nice, finished look. However, in the I-cord cast on you should only cast on one additional stitch rather than two, in order to have your stitch count come out accurately in the end.
  • Row 2 should have 4 “kf&b before and after every marker”. (Pattern only has you doing this 3 times instead of 4).
  • You need to remember to work the owl cable pattern on the WS rows. This isn’t mentioned in the pattern.
  • I used the "cabling without a cable needle" method as described by grumperina, which really makes those little owls a piece of cake!
Sleeves:
  • Pattern says to knit sleeves until they are 0.5” short of desired length (but no mention of actual length/per size). I was making the newborn size, and off the internet, this corresponds to 4” as measured from the underarm.
  • Also, I didn’t like that there wasn’t any arm shaping here, so this is what I did - Using magic loop, pick up all held stitches on scrap yarn, plus 7 under the arm (5 cast on stitches, plus 1 additional stitch on either side of these stitches to close any gaps. I put a marker in the center of these stitches to mark where I was going to decrease.)
  • I did a decrease row as follows: Knit to 2 sts before marker, ssk, pass marker, k2tog (decreasing the sleeve by 2 stitches). I repeated this decrease row every 6 stitches, a total of 4 times. Then I added 2 rows of garter stitch, binding off purl-wise on a knit row so the bind off blended into the garter stitch cuff. 
I also decided to add on this darling little owl cabled hat, Aly's Owls by Diana Dzendzeluk and some worsted weight socks Ribbed Far-Away Baby Socks by Amber Ward (I love the look of booties... but they never seem to stay on, and thus aren't very practical in my opinion!)

Here is the finished set after some steam blocking the make the little owls pop!