Showing posts with label gift. Show all posts

Tuesday, August 4, 2015

Dozens of Dainty Dishcloths


Dozens of Dainty Dishcloths
We are getting ready for a big, cross-country move... and I wanted to leave a little something for each of my wonderful friends.  I thought about socks... but my sock knitting ability wasn't up to knitting 17 pairs in a short 30 days... so what to do?  And then it hit me.... DISCHLOTHS.  Humble... I know; but oh-so-practical!  And so many pretty designs and beautiful colors.  I also learned a thing or two along the way about each pattern that I used, which I will pass along :).  


First up:   Grandmother's Favorite by Traditional Design.  
I think this might be the VERY first dischloth pattern that comes up on Ravelry when you type in "easy" and "knitted dishcloth" - and for a very good reason!  This is a mindless pattern that you can do just about anywhere.  Also, because it is knit on the diagonal, you don't lose your sanity in endless knit rows with no variation.  These are the first ones I started with.   Simple, no frills, and absolutely practical!


Next up:  The Almost Lost Washcloth by Julie Tarsha.
These little beauties are fun to knit, and provide almost an endless variation in color!  It is supposed to be knit flat, and then seamed at the end, but I quickly started doing a provisional cast-on (via a 16-18 stitch crochet chain) and grafting them together at the end with a garter Kitchener stitch.  Easy Peasy.  I also used the German short row method (love this!) It makes an almost invisible short row turn - and makes these cloths look very finished!


For a little added challenge, I also tried the Dash Cloth by Renee M (in two different color schemes):


And the Circle Cloth by hakucho:


As well as this cute Pumpkin Dishcloth by Kathleen (with bonus chart for those of you that prefer charted directions like I do!)


And have you tried illusion knitting yet?  What a fun technique!  The arrangement of purls and knit stitches makes a wonderful design that only pops out when you are eye-level with the piece!  Like this:  Illusion Snowflake by Emily Byrd Adams 


From there, I branched out into a couple of cute crochet versions:  Rose In Bloom Crochet Dishcloth by Deb Wolf 


But my very favorite?  Hands-down it was: Yvonne's Double Flower Cloth by Yvonne Hussey 
This sweet cloth looks fancy... but the pattern is very intuitive, and easy to follow.. and such a gorgeous result!


I hope this list has motivated you to do some fun knitting of your own! I also whipped up a batch of cards to attach to these little handmade gifts:


Feel free to click on the picture, and download your own!
https://www.dropbox.com/s/dcchuphv8dzg6si/Dischloth%20labels.pdf?dl=0


Monday, March 3, 2014

Lost No More! - {with free pattern}


I just love stitch markers… they turn even an ordinary knitting project into something special!  The only thing I don’t love about them is how easily I seem to lose them.  They slide off into neverland… into the bottom of project bags, and in between my couch cushions.  The solution?  Stitch marker sized traveling pouches!  I think these little pouches are so cute (and easy to sew!)


Ready to sew?  You need to cut a strip of your chosen fabric 2.5" by 11", as well as a piece of iron or sew-on interfacing 2.5" by 5.5".  The interfacing gives your finished pouch a little more body, but it is not absolutely necessary.


Fold the main fabric in half lengthwise (right sides together) and either fuse or pin your interfacing on top.  Stitch, 1/4" around the outside edges, leaving a 2" hole on one long side for turning.
 
 
Now, turn it right side out through the hole on the side, and press (please, please, please press.  Really.  It will make your life sooooo much easier!)  Next, it's time to add the snap.  I use plastic resin snaps with a hand-held snap press (like these ones).  They have recently become readily available at many local fabric stores (I used to have to order them from China, and wait a long time for them to arrive!)  However, you can use any closure you would like (velcro, button, metal snap, etc).  Place a female snap centered, approximately 5/8" down from one short side. 
 
Fold the piece you placed the snap on up to make a pouch about 2" tall, and stitch close to the edge up one side, across the top (this will be the flap), and down the other long side.  This will make the pouch, and close up the turning hold on the side, all in one fell swoop!
 
 
Fold the flap down to mark the placement of the male snap, and put it in place.... and there you have it!  Your very own stitch marker pouch :).


Friday, February 21, 2014

Time for a Cuppa?

Nothing kicks me into high gear like an upcoming swap on Ravelry!  (By the way... if you knit or crochet.. and you don't know what Ravelry is, you need to head on over and check it out!!!)  Crafty-wise... there is nothing I like more than to sew/knit/craft the perfect package to send out to my swap partner.
 
The "Just Add Water" swap in the Ewe LaLa group on Ravelry was certainly no exception.  The idea was to come up with a tea-themed package that would delight its recipient :).  First... the tea cozy!  My swap partner's kitchen has touches of lime green... so I went with the reversible Emily Tea Cozy pattern in cream and lime green.  I knit the front and back pieces 2-at-a-time magic loop.  This is my very favorite way to knit something that has more than one identical piece, because you are assured that they are exactly the same size, and you only have to read the chart once!


Next, I knit up a sweet little dishcloth (also in lime green) using 100% cotton, with a cute teapot motif, "Tea Pot Dishcloth by Rachel van Schie"


Of course, I also included lots of other fun hand-mades, some yummy tea, and scrumptious yarn....


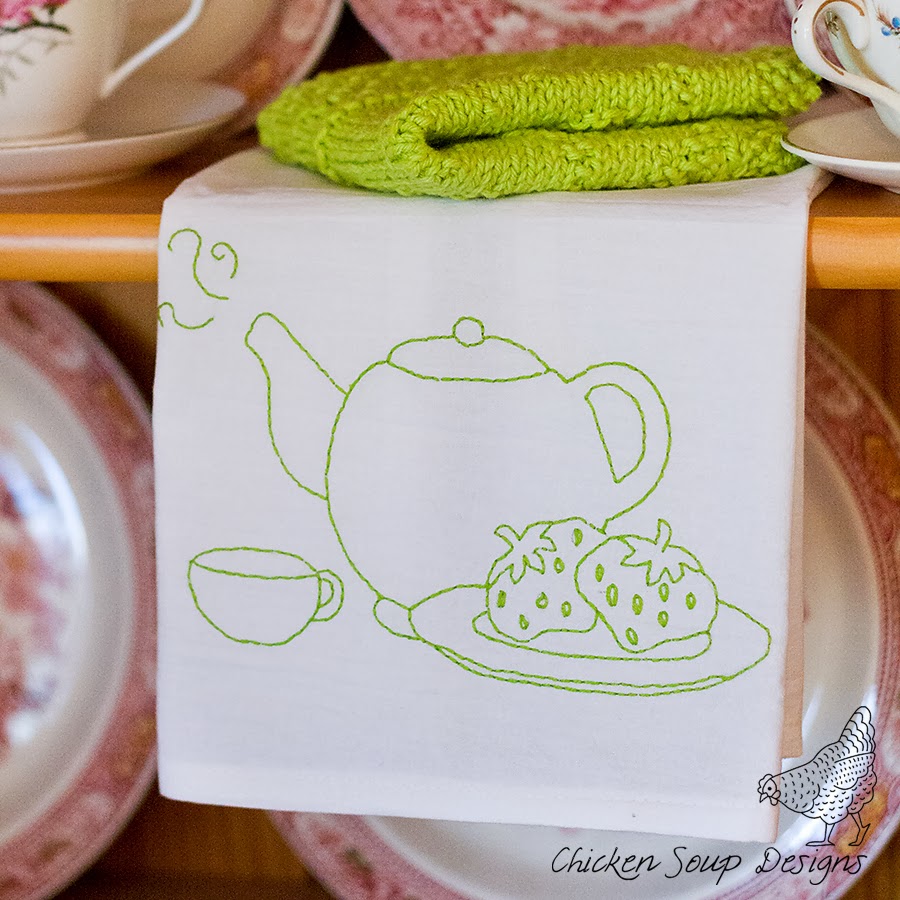
However, I think one my very favorite things to make was the embroidered tea towel :) (also in lime green, of course!). 


Just in case you would like to embroider your own sweet little tea party towel, I've included a link to my free pattern below (just click the picture).  Have a cuppa on me!
 
 
https://dl.dropboxusercontent.com/u/74477577/Strawberry%20Tea%20Embroidery%20Pattern.pdf


Tuesday, February 11, 2014

Valentine Squeak Kitchen Towel

One of my favorite ways to brighten up my kitchen is to add a new towel to my rack - especially a hand-embroidered one!  Dish towels make the perfect housewarming or wedding gift because they are so versatile and can be made to fit any kitchen. Best of all, the one I am sharing today whips up quickly; and what could be cuter than a sweet little mouse sending some love to his special "somebody"! 


I have a secret, though... when you buy a pack of flour sack towels, they are almost always enormous (33" x 38").  Standard kitchen towels are normally 25" x 14".  So, what I normally do is cut each flour sack towel in half, and re-hem them.  This gives me twice the number of towels for my money (and they fit better in my drawers!)

All you have to do is download the pattern below, and print it in the size you need.  Trace it onto your fabric with a disappearing ink pen or a pencil, and then embroider the design any-which-way you’d like.  I used backstitch for most of the design on my towel:


and lazy daisy stitch (sometimes called a "detached chain) for the flower leaves, and satin stitch for Mr. Squeak's eyes.  And there you have it ... the perfect gift for your special somebody!

 
Download your free pattern by clicking on the picture below:
 
https://dl.dropboxusercontent.com/u/74477577/Valentine%20Squeak%20Embroidery%20Pattern.pdf


Saturday, February 8, 2014

Sending A Little Love....

I adore Valentine's Day.... knitting, that is!  Every year, I tend to go a little overboard with my projects (and this year was certainly no exception).  And who can blame me?  Red & White, Pink & Red, Pink & White; they are all such great color combos. 
 
And what goes better with some Valentine's chocolate than coffee (and free Ravelry patterns)?  I used the Valentine Mug Cozy by Kristen TenDyke to knit up these little cozies - a perfect fit for the ubiquitous Starbucks travel cup.  I altered the pattern to be in-the-round, and fit a travel cup rather than a mug as follows: 
I cast on 54 stitches (2 sections of 19 for the colorwork hearts, and 2 sections of 8 for two cable portions), and I did three rows of k1p1 ribbing for the top and bottom parts. With a size 4 needle for me - perfect proportions for a travel mug cozy - in the round - so no need to do colorwork on the “WS” of the cozy, like with the flat version.


Click to see this project on Ravelry!

Click to see this project on Ravelry!
 
I also knit up this little cozy using the Java Love pattern by Diane Pearl Kostecki - so sweet!
 
Click to see this project on Ravelry!
 

And who couldn't use a couple more of these cute dishcloths for the kitchen?  I knit them 2-at-a-time so that I would only have to read the chart once (but get two dishcloths out of the deal!)  Heart Dishcloth Pattern by Emily Jagos


And to finish it off - some Valentine's Day Sewing, using my current favorite bag tutorial (Terri Ann's Sock Sack).  Once again, I do make some modifications.  I like my bags fully lined, as well as the pockets - so I have adapted the pattern for that ♥)
 
 
And then one of my own design - featuring an outer zippered pouch for notions, a squared off bottom for sitting upright, and a top zippered enclosure to keep your knitting safe and secure!


I also made some of these cute little lined zippered pouches, using the tutorial over at Jedi Craft Girl.


I hope this upcoming Valentine's Day inspires some sweet crafting of your own! 

Monday, February 11, 2013

(3) Three Willows Cowls

I had the privelege of test knitting this lovely little pattern for  PixeKnits, called the Three Willows Cowl. Knit up with 2 skeins of Cascade Pacific Chunky… it is oh so soft!  I love this wonderful wool acrylic blend (I will definitely be using it again!) My beautiful daughter is modeling it for me, since the recipient in each case was unavailable. Can you tell who I always use as my model, lol?

My first version is with the recommended cast-on of 90 stitches in #44 Italian Plum (Cascade Pacific Chunky): 


The next time, I wanted the cowl to have a little more drape, so I increased the cast on to 123 stitches (you need a multiple of three).  Here it is again, also in the Italian Plum colorway:

 
The recipient of the above cowl liked it so much, she asked for another one in a different color (taupe). 
 
If you are in the market for a fast, easy, and elegant looking cowl pattern, give this one a try!  Very versatile, with lovely drape; just what a cowl should be!

Saturday, November 24, 2012

Glove Love

Isn't it great having crafty friends on facebook?  Not only can you share your latest creation... but you can take inspiration from all of theirs, lol!  That's exactly what happened with my latest couple of projects.  Enter "Vancouver Fog by Jen Balfour".  I had picked up some lovely, hand-dyed superwash yarn in a detash on Ravelry, and using my favorite "cabling without a cable needle technique" by grumperina, I came up with these beauties (project info on Ravelry):


For this particular pattern, anytime the directions instructed to “slip stitches to a cable needle and hold them to the back” I used this part, and if it read to “slip stitches to a cable needle and hold them to the front”, I used this part. With this particular pattern, you are only holding at the most 2 stitches on a cable needle before knitting them, so the technique works out very well.
For example, in the pattern you do a
lpk – slip 2 stitches to cable needle and hold to front, p1, k2 from cable needle
I would slip 2 stitches purlwise (with yarn in back) onto my right hand needle, p1, and then with my left needle tip, I would insert the needle into the front of those two stitches I slipped, and pinching the base of the 3 stiches (the one I purled and the 2 I slipped) I would pull out my right hand needle altogether from those stitches. That leaves the 2 slipped stitches on my left needle and the one stitch I purled hanging in midair :) I put my right needle tip back into the hanging purl stitch, and then I knit those 2 stitches I slipped from the left needle to the right needle… and voila! lpk completed. If it is a right crossing instruction, you just repeat the process, but insert the left needle tip into the back of the stitches. Once you get the hang of it… it is so much faster than using a traditional cable needle (IMO, lol!)

After estimating my remaining yarn (with a glass half-full attitude, I might add!), I decided to try the Treads, a tipless gloves pattern by Victoria Anne Baker (also free on Ravelry).  I love the lateral braid that decorates these mitts, and by using this informative video (in English, instead of the reccomended video in German), I managed after an attempt where my braid ended up on the INSIDE of my mitt, to come up with the right pattern stitch!  However, I really did not have as much yarn as I had hoped, and so I couldn't complete the fingers and had to go with a ribbed, fingerless ending.
 
See how much yarn I had left by the end?  Here's the link to my project page on Ravelry, "Treading Lightly".


 I've never done gloves with fingers, or tipless fingers for that matter, though.. so I really wanted to knit this pattern again as written.  So... take 2 was knit up with a skein of malabrigo (809 Solis).. which was so buttery soft it was a joy to knit with!  This time the lateral braid worked like a charm.  It really is a fun addition to your stitch library!  (Project info on Ravelry)


What's next, you might ask?  Well... I have several skeins of that malabrigo left... so I think another pair of the Vancouver Fog are calling my name (and going straight into the Christmas Box!)  I really enjoy knitting with this yarn.  Here they are (more info on Ravelry):


Enjoy!